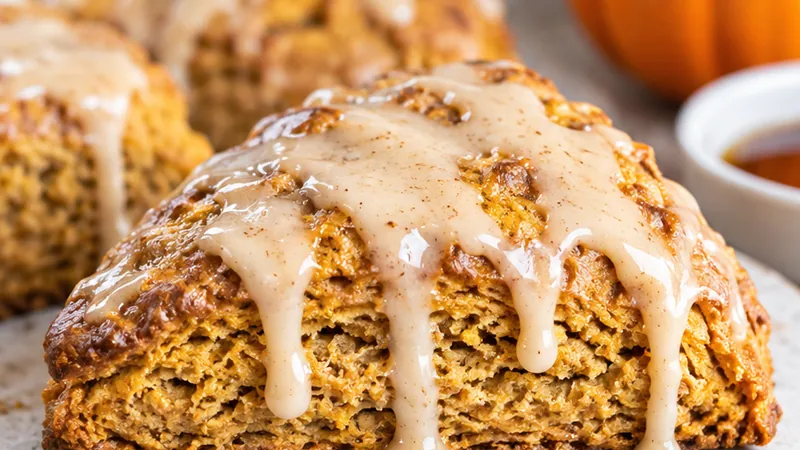
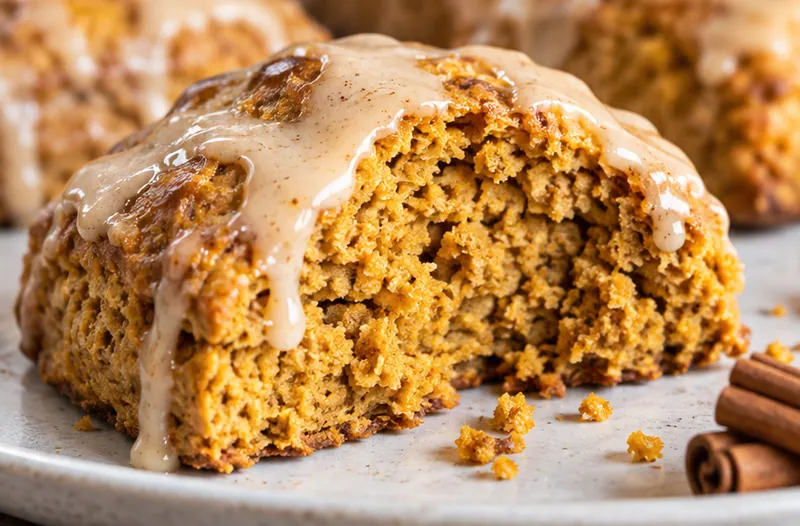
There is something about the smell of pumpkin and cinnamon baking in the oven that instantly makes a kitchen feel like autumn. These scones come out with crisp, golden edges and a soft, tender crumb studded with warm spice, and once you drizzle that maple glaze over the top, they taste just like the ones from your favorite coffee shop bakery case, only better because they are fresh and homemade.
I love making these on a crisp Saturday morning when the leaves are starting to turn and I want something cozy to go with my coffee. They are also perfect for holiday brunches, fall potlucks, or whenever you want to fill the house with that unmistakable pumpkin spice aroma. Since the dough comes together quickly and can even be shaped ahead of time, they are an easy way to bring bakery quality baking to your own table without much fuss.
 Save
SaveThe first time I made these, I was trying to recreate a scone I used to buy every October from a little bakery near my old apartment, and after a few tries I finally landed on this version. It has become one of my most requested fall recipes, and I think once you taste that tender, spiced crumb with the sweet maple drizzle, you will understand exactly why.
Bakery-Style Pumpkin Scones with Maple Glaze
Ingredients
Pumpkin Scones
Maple Glaze
Instructions
- Preheat the oven and prep your pan
Set your oven to 400 degrees Fahrenheit and line a large baking sheet with parchment paper. Getting the oven fully preheated before the dough is ready helps the scones rise properly and develop those crisp, golden edges as soon as they go in.
- Whisk together the dry ingredients
In a large mixing bowl, whisk together the flour, brown sugar, baking powder, salt, cinnamon, ginger, nutmeg, and cloves until evenly combined. Breaking up any clumps of brown sugar now ensures the spices are distributed evenly throughout the dough.
- Cut the cold butter into the flour
Add the cold, cubed butter to the dry ingredients and use a pastry cutter or your fingertips to work it in until the mixture looks like coarse crumbs with some pea sized pieces of butter remaining. Keeping the butter cold is key, since those little pockets of fat are what create a flaky, tender texture once baked.
- Mix the wet ingredients
In a separate bowl, whisk together the pumpkin puree, the 1/4 cup of heavy cream, the egg, and the vanilla extract until smooth and fully combined. Make sure there are no streaks of egg left before moving on, so the dough comes together evenly.
- Combine into a shaggy dough
Pour the wet mixture into the bowl with the flour and butter, then stir gently with a spatula or wooden spoon just until a shaggy, slightly sticky dough forms. Avoid overmixing at this stage, since working the dough too much will make the scones tough instead of tender.
- Shape the dough into a disc
Turn the dough out onto a lightly floured surface and gently pat it into a round disc about 8 inches wide and 1 inch thick. Use floured hands and light pressure, since pressing too firmly will compact the layers of butter you worked so hard to create.
- Cut the dough into wedges
Using a sharp knife or bench scraper, cut the disc into 8 even wedges, like slicing a pizza. Wipe the blade clean between cuts so the edges stay sharp and defined, which helps the scones rise tall and even in the oven.
- Chill the scones before baking
Transfer the wedges to the prepared baking sheet, spacing them about 2 inches apart, and place the pan in the freezer for 10 to 15 minutes. This quick chill firms the butter back up after handling, which is what gives bakery style scones their tall, flaky rise.
- Brush with cream and bake
Brush the top of each scone lightly with the remaining heavy cream, which helps them turn a deep golden brown. Bake for 18 to 22 minutes, until the tops are golden and a toothpick inserted into the center comes out clean or with a few moist crumbs.
- Cool on a wire rack
Let the scones rest on the baking sheet for about 5 minutes, then transfer them to a wire rack to cool for another 15 minutes. Glazing them while they are still slightly warm helps the maple glaze soak in a little, but they should not be hot or the glaze will simply melt off.
- Make the maple glaze
While the scones cool, whisk together the powdered sugar, maple syrup, heavy cream, maple extract if using, and a pinch of salt in a small bowl until smooth and pourable. If the glaze feels too thick, add more cream a teaspoon at a time until it reaches a consistency that drizzles easily off a spoon.
- Glaze and serve
Drizzle or spoon the maple glaze generously over the top of each scone, letting it drip down the sides. Let the glaze set for about 10 minutes before serving so it firms up slightly, then enjoy the scones while they are still fresh and tender.
Substitutions and variations
- If you do not have heavy cream, whole milk will work in the dough, though the scones will be slightly less rich and tender.
- You can swap the individual spices for 1 3/4 teaspoons of pumpkin pie spice if that is what you have on hand.
- For a dairy free version, use a plant based butter that is solid and cold, along with full fat coconut cream in place of the heavy cream.
- A measure for measure gluten free flour blend can replace the all purpose flour, though the scones may spread slightly more while baking.
- If maple syrup is not available, the glaze can be made with vanilla extract and a splash of milk instead for a classic vanilla finish.
Chloe's tips
- Keep your butter, pumpkin puree, and cream cold right up until you mix them in, since a cold dough is the secret to a tall, flaky scone.
- Do not skip the freezer chill after cutting the wedges, as it makes a noticeable difference in how well the scones hold their shape while baking.
- Use a light hand when patting out the dough, since overworking it will lead to dense, tough scones instead of a tender crumb.
- For extra bakery style flair, sprinkle a little coarse sugar over the cream wash before baking for a slightly crunchy top.
How to store it
- Store leftover glazed scones in an airtight container at room temperature for up to 2 days.
- For longer storage, refrigerate the scones in an airtight container for up to 5 days, then let them come to room temperature before serving.
- Unbaked, cut scone wedges can be frozen on a tray until solid, then transferred to a freezer bag and baked straight from frozen, adding a few extra minutes to the bake time.
- To refresh a scone the next day, warm it in a 300 degree Fahrenheit oven for about 5 minutes so the edges crisp back up.
Serving suggestions
These pumpkin scones are wonderful on their own, but a few simple pairings can turn them into a full fall spread.
- Serve alongside a hot cup of coffee or a spiced chai latte for a cozy morning pairing.
- Add a small dish of whipped cinnamon butter on the side for spreading over warm scones.
- Pair with a bowl of fresh sliced apples or pears for a light, refreshing contrast to the rich spice flavor.
- Set them out on a platter with other fall baked goods for a festive brunch or holiday gathering.
Frequently asked questions
Can I make the scone dough ahead of time?
Yes, you can shape the dough into wedges and refrigerate them, covered, for up to 24 hours before baking. This actually makes the butter even colder, which can give you an even better rise in the oven.
Why do the scones need to chill before baking?
Chilling the shaped dough firms the butter back up after handling, which prevents the scones from spreading out flat in the oven. That short rest in the freezer is what keeps the layers tall and flaky instead of dense.
Can I use fresh pumpkin instead of canned puree?
You can, but make sure it is well drained and thick, since fresh roasted pumpkin tends to hold more water than canned puree. If the puree seems watery, blot it with a paper towel before measuring so the dough does not turn out too wet.
My scones turned out dry. What went wrong?
Dry scones are usually caused by too much flour or overbaking. Try spooning the flour into your measuring cup and leveling it off rather than scooping directly from the bag, and start checking the scones a couple of minutes before the minimum bake time listed.
Can I freeze the baked and glazed scones?
It is best to freeze the scones before glazing, since the glaze does not thaw as nicely. Bake and cool the plain scones completely, freeze them in an airtight container, then thaw and add fresh glaze whenever you are ready to serve them.
Let's get cooking!
These bakery style pumpkin scones with maple glaze are proof that you do not need a trip to the coffee shop to enjoy a truly special fall treat. With their tender, spiced crumb and sweet maple finish, they are perfect for slow mornings, holiday brunches, or anytime you want your kitchen to smell like autumn. Give them a try this season, and do not be surprised if they become a new family favorite you find yourself baking again and again.