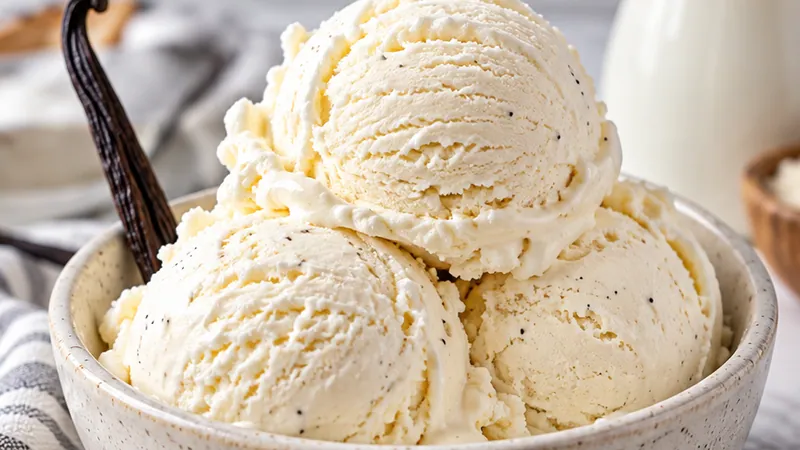
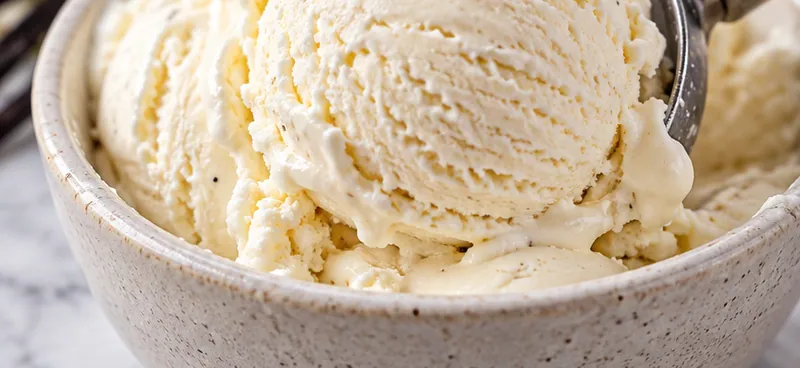
There is something so comforting about scooping into velvety homemade vanilla ice cream, watching it pile up in a cool glass bowl. The sweet vanilla fragrance fills the kitchen, and each spoonful feels like a little celebration.
I like to make this on warm weekend afternoons or when I am craving something simple yet special after dinner. It is a small effort for a big reward that feels totally indulgent but still fresh.
 Save
SaveMaking it at home also means I know exactly what is inside, and I can tweak the vanilla and sweetness to match my family’s taste. One batch always sparks memories of sitting outside with a scoop in hand, laughing with the people I love.
Homemade Vanilla Ice Cream Recipe
Ingredients
Base
For serving
Instructions
- Whisk sugar, milk, and corn syrup
In a medium saucepan, whisk together the milk, sugar, and corn syrup over medium low heat. Stir often until the sugar dissolves and the mixture is just steaming, do not let it boil.
- Add cream and vanilla
Slowly pour the heavy cream into the milk mixture while whisking. Add the vanilla and salt, then whisk until fully combined and smooth.
- Chill the base thoroughly
Cover the pan and refrigerate the mixture for at least 2 hours, or preferably overnight. A very cold base helps the ice cream churn faster and stay creamy.
- Churn in an ice cream maker
Pour the chilled base into your ice cream maker and churn according to the manufacturer instructions, usually about 20 to 25 minutes, until it reaches a soft serve consistency.
- Transfer to a freezer safe container
Quickly scrape the ice cream into a lidded freezer safe bowl. Smooth the top with a spatula to help it freeze evenly.
- Freeze until firm
Let the ice cream freeze for at least 4 hours, or until it is firm enough to scoop. For best texture, leave it to harden overnight.
- Let it soften slightly before serving
Take the container out of the freezer about 10 minutes before you plan to scoop. This makes scooping easier without melting the ice cream.
- Scoop and garnish
Scoop the ice cream into bowls or cones, then add fresh berries, a drizzle of chocolate sauce, or a sprinkle of your favorite toppings.
- Store leftovers properly
Press a piece of parchment directly onto the surface of the ice cream, then seal the container tightly to prevent ice crystals.
- Enjoy slowly
Serve with spoons that have been warmed under hot water for silky smooth scoops, and enjoy with family or friends.
Substitutions and variations
- Use half and half instead of whole milk for a richer but slightly lighter texture.
- Swap granulated sugar with an equal amount of organic cane sugar if you prefer.
- Replace corn syrup with 1 tablespoon of vodka to help keep the ice cream scoopable.
- Use honey or maple syrup in place of sugar, but note the flavor will shift slightly.
- For a dairy free version, choose a high fat coconut milk or oat cream and a dairy free vanilla.
Chloe's tips
- Always chill the base before churning for a smoother texture and faster freezing.
- For extra flavor, steep a split vanilla bean in the warm milk mixture for 20 minutes before adding the cream.
- If you do not have an ice cream maker, pour the chilled base into a shallow tray and freeze, stirring every 30 minutes until firm.
- Avoid over churning, or the ice cream may become too fluffy and icy over time.
How to store it
- Keep in an airtight container in the coldest part of your freezer for up to 1 week for best texture.
- To refresh slightly grainy ice cream, let it sit at room temperature for 5 minutes, then re churn or whisk vigorously before serving.
Serving suggestions
Serve scoops in chilled bowls or warm waffle cones for the best experience.
- Place one to two generous scoops in a chilled dessert bowl.
- Drizzle with warm chocolate sauce or caramel, if desired.
- Top with fresh berries, toasted nuts, or a sprinkle of sea salt for contrast.
Frequently asked questions
Why is corn syrup optional in this recipe?
Corn syrup helps prevent large ice crystals for a smoother texture, but it is optional. You can use vodka or just skip it if you prefer, knowing the texture may be a bit more icy.
How do I make this dairy free and still creamy?
Use full fat coconut milk, oat cream, or a high fat dairy free alternative, and choose a dairy free vanilla. The fat content is key to a creamy result.
Can I use an ice cream maker or do I need one?
An ice cream maker gives the best texture, but you can also freeze the base in a shallow tray, stirring every 30 minutes until firm if you do not have a machine.
How do I store ice cream to keep it soft enough to scoop?
Store with a piece of parchment pressed directly onto the surface and keep the container airtight. Let it sit at room temperature for a few minutes before scooping if it is very firm.
Let's get cooking!
Making vanilla ice cream at home is simple, deeply satisfying, and so worth sharing with the people you care about. Enjoy every cool, creamy bite and savor the little moments of sweetness in your day.