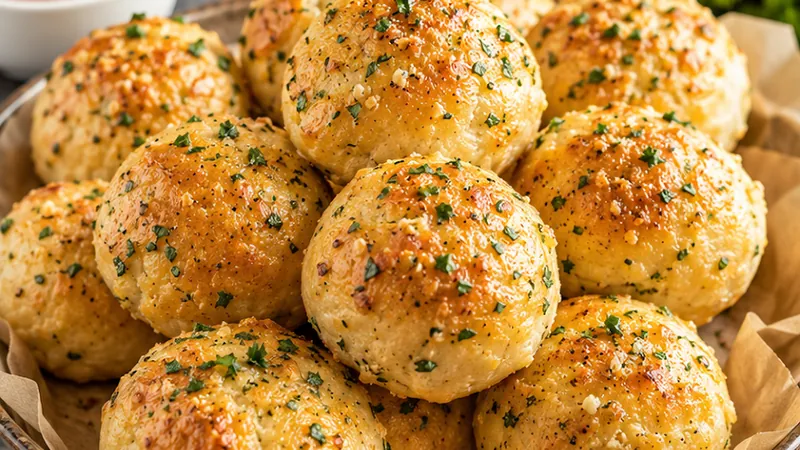
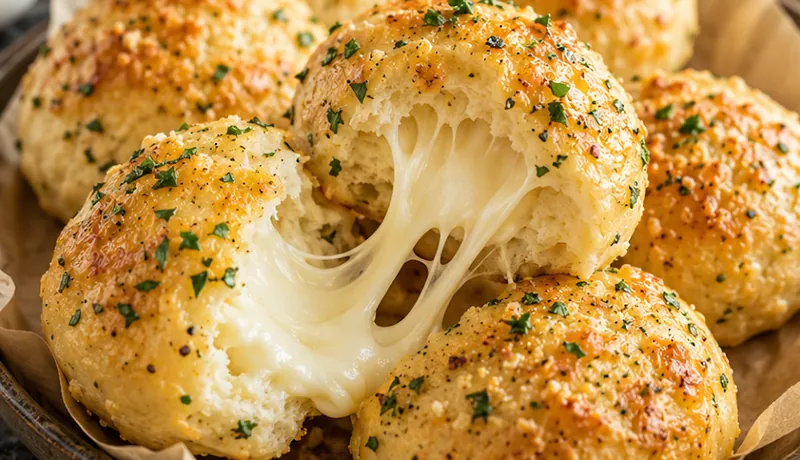
As soon as these Pillsbury Biscuit Garlic Butter Cheese Bombs come out of the oven, the kitchen smells like a cozy Italian dinner, with warm butter, roasted garlic, and stretchy melted cheese filling the air.
I love making these for game night, a casual weeknight dinner, or a small appetizer tray, because they feel indulgent but are simple to pull off.
 Save
SaveOne batch always reminds me of sharing easy, joyful food with friends, and one bite will have you planning the next gathering just to make them again.
Pillsbury Biscuit Garlic Butter Cheese Bombs Recipe
Ingredients
Garlic Butter Filling
Assembling the Bombs
Instructions
- Make the garlic butter
In a small bowl, beat the softened butter with minced garlic, salt, pepper, and garlic powder until smooth and fragrant. Taste and add a little more salt if needed.
- Preheat your oven
Heat your oven to 375°F (190°C) and line a baking sheet with parchment paper or a silicone baking mat so the bombs won’t stick.
- Prepare the biscuits
Open the biscuit can and separate the dough into individual biscuits. Keep them cold until you are ready to work with them so they roll out easily.
- Roll out each biscuit
On a lightly floured surface, gently roll or press each biscuit into a circle about 4 inches across. If the dough is too soft, chill it for 5 to 10 minutes between biscuits.
- Add the garlic butter
Place about 1 tablespoon of garlic butter in the center of each biscuit circle, spooning it into a small mound.
- Add the cheeses
Sprinkle 1 to 2 tablespoons of mozzarella and a small pinch of Parmesan over the garlic butter, then add a light pinch of parsley if using.
- Form the bombs
Gently bring the edges of the biscuit dough up and around the filling, pinching the dough together tightly so there are no gaps and the ball is sealed.
- Chill briefly and then bake
Place the formed bombs seam side down on the prepared baking sheet and chill for 5 minutes in the fridge to help them hold their shape. Bake for 12 to 15 minutes, or until the tops are golden brown and the centers are puffed.
- Rest and serve
Let the bombs rest on the baking sheet for 3 to 5 minutes before transferring them to a serving plate, because the filling will be very hot right out of the oven.
- Enjoy warm
Serve the Pillsbury Biscuit Garlic Butter Cheese Bombs warm for the best stretchy cheese texture, and offer extra garlic butter on the side for dipping.
Substitutions and variations
- Use salted butter and reduce added salt to 1/8 teaspoon if you prefer, adjusting to taste.
- Swap minced garlic for 1/2 teaspoon garlic powder mixed into softened butter if you are in a hurry.
- Replace mozzarella with sharp cheddar for a bolder flavor, or use an equal amount of shredded vegan cheese for a dairy-free version.
- Use gluten-free biscuit dough or gluten-free bread rolls if you need a gluten-free option.
Chloe's tips
- Keep the biscuit dough cold while you work so the layers stay distinct and the bombs hold their shape.
- For extra flavor, toss the shredded mozzarella with a pinch of the garlic butter before wrapping.
- Reheat any leftovers in a 350°F (175°C) oven for 5 to 7 minutes to refresh the crust and melt the cheese.
How to store it
- Store cooled bombs in an airtight container in the refrigerator for up to 2 days.
- To reheat, warm in a 350°F (175°C) oven for 5 to 7 minutes until the cheese is melted and the biscuit is hot.
- Freeze assembled but unbaked bombs on a tray, then transfer to a freezer bag; bake from frozen, adding 2 to 3 minutes to the cook time.
Serving suggestions
These are perfect as a party appetizer, a cozy game day snack, or a fun side dish for a weeknight dinner.
- Serve warm with extra garlic butter for dipping
- Pair with a simple green salad and roasted vegetables
- Add a light sprinkle of red pepper flakes for a subtle kick
Frequently asked questions
Can I make these ahead and bake later?
Yes, you can assemble the bombs, chill them, and bake later. If they are chilled, add about 2 to 3 minutes to the bake time until the centers are hot and bubbly.
What if I don’t have fresh parsley?
You can skip the parsley or use 1/4 teaspoon of dried Italian herbs for a similar herbal note.
Can I freeze these after baking?
It is best to freeze them before baking, since reheating baked biscuits can dry them out. Bake from frozen as directed.
Can I use a different type of cheese?
Feel free to mix in shredded cheddar, Swiss, or your favorite melty cheese. Just keep the total shredded cheese around 1 to 1 1/2 cups per batch so the bombs stay easy to wrap.
Let's get cooking!
With just a few simple steps, you can turn a humble can of Pillsbury biscuits into showstopping, cheesy garlic butter bombs that everyone will love, so go ahead and give this recipe a try at your next gathering.